Happy Friday everyone! I hope you have enjoyed the first week of the 12 Days of Christmas at the Jar! Stay tuned next week for more DIYs, inspiration and giveaways! Enjoy this scrumptious DIY from the Hungry Bee!
As soon as the temperature slightly dropped in Miami, I had the sudden urge to make jam. I had never made jam before, but I thought it might make for a fun holiday project. My original plan was to make strawberry jam with hand-picked fruit from a farm in Homestead known for its delicious strawberry shakes and fresh produce. Once the season opened, I hurried down to the farm on my day off, but as it turned out, the berry field would not be ready until January.
Determined to make my jam dreams come true, my experiment began with a test run of store-bought strawberries which I used to make a small batch of jam with my newly purchased canning equipment. I have to admit it took me several days to research canning history, safe procedures (yes, you do not want to give anyone botulism), and the necessary tools involved. I could go on for pages discussing all the details of jar and lid sterilization, preserving temperatures, etc, but instead, here is the link to a lengthy but very useful USDA document covering every aspect of this culinary process: Complete Guide to Home Canning (http://www.uga.edu/nchfp/publications/usda/2_USDAcanningGuide1_06.pdf).
The strawberry jam turned out delicious, but I still continued with the idea to use a local seasonal fruit for a larger batch.
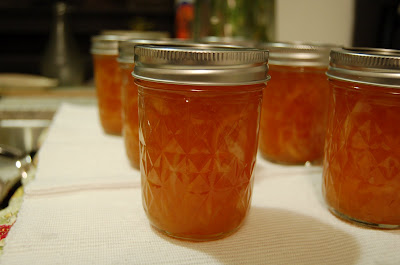
I proceeded to try my luck with citrus. Due to the lack of local berries this time of year, I decided to try orange marmalade instead. I guess you can’t get more Florida than that! I followed a recipe from a charming cookbook called Canning for a New Generation: Bold, Fresh Flavors for the Modern Pantry by Liana Krissoff. My grandma, who is visiting from Lima, helped me digest the directions and made a wonderful sous-chef. She actually remembered every single step and measurement better than I did!
This is how we did it (makes exactly 6 half-pint jelly jars):4 pounds of navel oranges (about 7 to 10)
2 lemons
1/3 cup strained freshly squeezed lemon juice
3 cups of sugar
The very first thing to consider when you enter the kitchen is to get the canning pot filled with water (1-2 inches of water over the jars) and on the stove, as it will take about 30 minutes to boil. This water will be used for both sterilizing the jars/lids and processing the preserves. I recently purchased a 21.5 quart granite ware canner with a rack. It is that extremely large but light-weight pot you sometimes see at hardware stores which is black with white specks. The rack helps to keep the jars from touching the bottom of the pan or other jars which can weaken the glass jars.
Add the sugar to the pan and boil over high heat, stirring occasionally, for about 40 minutes until the mixture reaches 220 °F.
Place your sterilized jars and lids on a towel to dry for a minute (a jar lifter is useful for easy and safe removal of jars out of the boiling water). Ladle the hot marmalade into the jars, leaving about a ¼ inch headspace at the top. Use a damp paper towel to wipe the rims of the jars and place the flat lid and ring on each jar (rings do not require sterilization). Screw on rings just to the point where you feel resistance. It is important not to over-tighten the lid rings since air bubbles must escape out of the jars during processing.
Return the closed, filled jars into the boiling water of the canning pot. Process for 5 minutes. Remove the jars out of the pot and place them on a towel to be undisturbed for at least 12 hours. You will hear a ‘pop’ sound made by the center of the lids pulling downwards. This means they sealed properly. If this does not occur, the jar should be refrigerated immediately for preserving.
Feel free to comment with any questions you might have. You can also check out my brand new blog at http://thehungrybee11.blogspot.com/
Happy Holidays and Happy Crafting!


No comments:
Post a Comment