This first tutorial for Kate's birthday preparations is focusing on invitations. Invitations most certainly set the scene and mood and are your guests first impression of how awesome your party will be! When you send or hand deliver an invitation that is worth hanging on to or even worthy of refrigerator real estate then you've set the stage for a great party! I racked my brain for a long, long time to try and think of something that would be worthy for a vintage derby party. I haven't been super impressed with a lot of horsey type derby images so I continued to search for the perfect way to invite our guests to a lovely afternoon of horse racing. Through a google image search I found this blog that caught my eye. Although this project was originally intended for a halloween project I knew I could take it and make it perfect for Kate's invite. So, here I give you the tutorial for making equestrian ribbon invites :) Enjoy!


Supplies:
page from a book
scalloped punch
2 inch circle punch
hot glue
ribbon (I used 2 different widths)
fabric scissors
paper trimmer
black cardstock
print out of number (Click here to download the numbers from domesticfluff.com
Step 1:
I trimmed 2 strips from the book page on my paper trimmer that were the same width

Step 2:
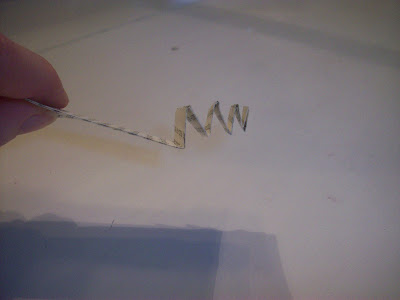
Stack your 2 strips on top of each other and begin your accordian fold making small pleats. Crease them so the edges are crisp.

Step 3:
Seperate the two strips and put them end to end. With a dab of hot glue make 1 long strand of accordian folds.


Step 4:
At this point, punch a 2 inch circle from your black cardstock and layer with a scalloped punch number.


Step 5:
Connect the 2 ends of your accordian folded book page together. Push the circle flat and gather the points in the middle.


Step 6:
Glue your number circle into the middle of your accordian and hold until the glue sets.

Step 7:
Cut 2 of the same lenghts of each color of your ribbon. Stack and glue them to the back of your rosette.

Step 8:
Cut points into your ribbons

Step 9:
Hot glue your rosette to the ribbons
Hot glue your rosette to the ribbons
Step 10:
I covered the back of the invitation with another black cardstock circle to cover the ribbon. I will add a smaller white cardstock cirlce to the back of the invite with the information for the party at a later date.
So that's it! Easy peasy right! I plan on using these cute equestrian ribbon rosettes on other things for the party. Next party prep project is individual cupcake stands! See you next time :)

1 comment:
I know you love crafting, but seriously, do you have to make me look bad? I print invitations from Shutterfly.
Post a Comment