Friday, March 23, 2012

a kitchen revamp part 3 wrap up

In this post I'll be wrapping up some loose ends on the kitchen revamp.  I can see the light at the end of the tunnel.  Or am I deliriously tired.  That’s probably it.   
 
This may be jumpy and random, but bear with me!  I’m going to try and provide as much info as I can in this wrap up!  Especially with the pictures. I'm about to lose it with my laptop and trying to drag these pictures in the right place.  URGGGGGGGG.....  So, here are the pictures of our finished kitchen...in no particular order because I don't even know how to get them in a particular order.  Enjoy! 


Menu on chalkboard wall


Chalkboard wall:  Wasn’t really planned.  I was inspired by this green chalkboard wall. 

gypsypurplehome.tumblr.com
I loved the soft green tint and thought it would be an awesome change from the normal black chalkboard paint.  I also thought it would be a good contrast against the blue island cabinets.  Dead wrong.  I mean, like made me cringe it was so bad.  While I loved the vintagy green chalkboard with the countertops and yardstick backsplash, did NOT love it with the blue cabinets.  And because repainting a wall was MUCH easier than repainting cabinets, the green had to go.  Major paint fail.
 
I went with the black chalkboard paint instead, but it is now a nice shade of gray from the chalk dust which is how you "prime" the chalkboard paint before using it.  I'm doing a little exchange with my friend Katie, she writes awesome stuff on my chalkboard wall and helps me with anything that needs nice writing and I'm helping her style her wedding in August.  Nice little trade off :) 
 
Chalkboards are kind of my thing so it seems fitting.  Plus, lil bit loves drawing on it.  These are mommy and daddy caterpillars.  And Baby Jesus.  She seemed appalled that I even had to ask what they were. 
 
Wall color:  I scoured every paint store imaginable to find a perfect shade of gray.  I wanted a warm gray, not too cool, no blue tint, no green tint.  That is a very tall order let me tell you.  Just when I was about to settle for something I wasn’t really even wild about, a new Sherwin Williams store opened right in our neighborhood.  I tell you the paint chip couldn’t have been more aptly named.  Perfect Greige.  Perfect mix of gray, beige, warm and fabulous.  Looks even better on the walls! 
 
Farmhouse sink:  We’ve owned this sink for nearly a year.  Just waiting for the day it would make its glorious appearance in our new house.  I can’t believe we hauled that nearly 130 pound sink from Erlanger to Walton, from Walton to Union.  Crazy.  But, good grief, she’s a beauty.  It’s the farmhouse sink from Ikea.  We initially thought it wouldn’t fit, but a little maneuvering of filler strips and clever cabinet cutting and it’s the star of the show.  The faucet is an ebay purchase also about a year ago. 
 
Light:  Allen + Roth for Lowes.  Awesome.  I've been stalking this light for a long time now and I'm so glad it finally got to come home with me!  We've had to change the lightbulb out to something a little brighter since this is our only light in the kitchen for right now.  We'll probably have to work on that because it can get pretty dark in here. 
 
Knick knacks:  I have a pretty stellar collection of crap already so I mainly used stuff I already owned.  I have a very bad habit (or so the hubs thinks) of rearranging stuff on a pretty regular basis, so I’m sure these items have not landed in their final destination.  I totally blame it on my merchandising background.  I did purchase a new sugar container (the bright yellow one) and a new utensil caddy (the bright colored one next to it) from Pier 1 to help brighten up the countertops.  The phone was a Christmas gift from Joey and Kate a few years ago, do they know me or what?  The rug runner is from Crate and Barrel. 
 
Detail of countertop
 

Well..that about wraps it up for the Marshall Kitchen Revamp!  Hope you've enjoyed our journey in new house remodeling!  If there is anything I missed and you would like to know the how to, the color of or where something was purchased, give me a shout and I’d be happy to oblige!


Wednesday, March 14, 2012

kitchen revamp part 2

White cabinets were not an option for us at the design center. They were considered an upgrade, and a rather expensive one at that. We picked a kitchen cabinet that would be both simple to paint, but also looked good while they weren’t painted. We chose a super flat profile with not a lot of wood grain.


I was in charge of painting the cabinets while Joey was working on the countertops. Scared out of my gourd. What if I mess them up? What if they look like garbage? I can’t tell you how many times I watched this video on Young House Love to make sure I was even doing it right.

I started with the smallest cabinet in the kitchen. It took me an entire week. Not. Cool.

I slowly started to find my stride and found that doing several doors at a time is the way to go. I knew there was no way I could tackle all of them at the same time since I was doing most of my work on the weekends and in the late evenings after the kiddo went to bed.

I chose a Benjamin Moore color "Mascarpone" which is a soft white and had it mixed in Clark & Kensington paint found at Ace. I wanted the island to have a pop of color so I used "Grand Hotel Mackinac Blue" by Valspar there. It’s on the same paint color swatch with Aqua Glow but I talked myself right out of the Aqua Glow long ago.

http://www.myperfectcolor.com/en/color/90321_Valspar-5007-9A-Grand-Hotel-Mackinac-Blue#!prettyPhoto

I sanded, used liquid sandpaper, 1 coat of primer and 2 coats of paint. They paint covered well and I’m hoping for several years of enjoying our white cabinets. For those of you (aheeemmm, dad) who I know are naysayers about painted cabinets that they scratch or whatevs, I think the paint will hold up just fine! Plus, I’ve already had to wipe down a few of the doors due to lil’ sticky fingers trying to get to her goldfish in the cabinet and it seems to wash well too.

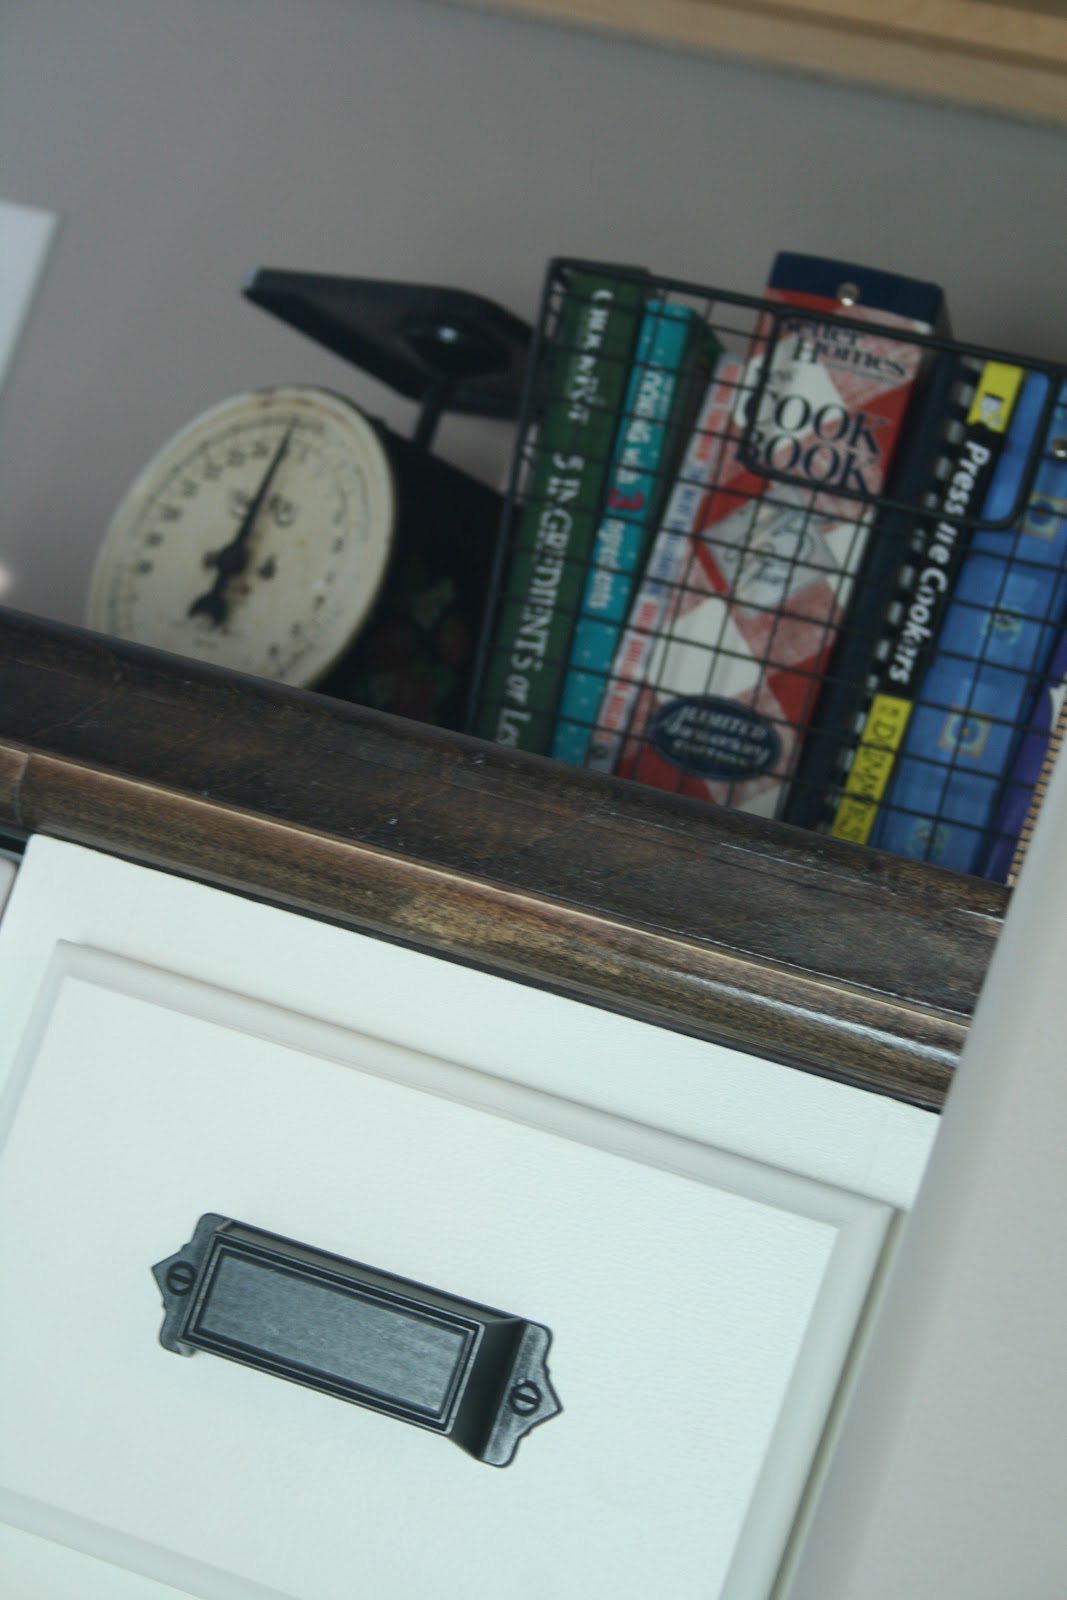
I love the end result! The knobs and drawer pulls are from Home Depot, Martha Stewart and if you live in the tri-state area I do apologize because we’ve cleaned out just about every Home Depot store in the area of this particular type.  (I don't know why the knob looks so much bigger than the pull, but that's not the case in real life.)

So there you have it folks. Thirty-something (I lost count) drawer fronts, doors and cabinet bases painted. My adventures in cabinet painting are officially over. And let’s just for the record keep it real because it’s my blog and I’ll complain if I want to. Hands down this was the worst DIY project I’ve ever tackled. I hope it doesn’t discourage any of you from doing it, just be very prepared for this to consume your life and take nearly f-o-r-e-v-e-r. Waaahhh wahhhh. Rich people problems, huh?

Speaking of rich people problems, and not that we are rich. Trust me. Not even close. But, we will have a few extra pennies in our account every month because our days of being real estate moguls and having 2 lovely mortgage payments monthly are OVER! We sold our beloved house and closed on March 6th. What a gigantic sigh of relief. We had been waiting for our house to sell to get some of the finer things in life, like a landline and the internet. Hence why all of the bloggy posts all of a sudden  :)

Next kitchen post, tying up the loose ends. It’s almost done!

Tuesday, March 13, 2012

kitchen revamp part 1

WARNING: This post is not for the faint of heart.  I know the thought of totally tearing up a brand new kitchen probably gives some of you heart palpitations.  Proceed with caution. Also, please note that while we certainly do use our kitchen to cook and entertain, we are not big foodies and don’t spend hours preparing fabulous meals like some. This kitchen will totally work for us because generally we can knock dinner out from prep to eating to cleanup in about 30 minutes. So, maybe not be a groovy kitchen for some, it fits our lifestyle perfectly :)   
(Our lovely builder stock kitchen)
So…you mean not everyone remodels a brand new kitchen in a brand new house? Just us? Oh. Well that’s kind of weird. Or maybe we are? The latter is probably true, but let me plead my case. It all began back in 2007, yes, nearly 5 years ago that this magazine came to our little house on Spruce Tree Lane. We oooohhhhed and awwwwwed over every last detail in this kitchen. From the white cabinets to the super dark countertops we knew this kitchen (or parts of it) would someday be ours. There may have even been a small Wayne’s World quote said (You will be mine..oh yes..you will be mine.) We’ve hung on to that magazine and still look at it frequently.

Fast forward to several years later and we finally have a kitchen worthy of this kind of greatness. You may recall that back when we were picking out some details for our newly built house, we kept our choices very basic knowing that a remodel would be in store. I figured we would live with the builder’s stock kitchen for a few years and then start working on making it our own Marshall vintage/modern, colorful, playful, whatever type thing we have going on in the rest of our house. Apparently my hubs had a different idea. I wake up one lovely Sunday morning to find this. Joey with an iron in one hand, a putty knife in the other. He has half of laminate peeled up in one section of the countertop. So...okay...guess we are getting started? That’s the good thing about my hubby. If you’ve never met him, he’s a quiet lad, unless prompted to talk about the UK Wildcats, his Derby glass collection, beer making or bourbon. Since countertops don’t top this list, it’s no wonder he didn’t tell me he was starting. But, it’s okay. I like change. So, let’s do this!


Because I wasn’t participating in this mess, I don’t have super technical steps on how to do this. If you have questions, email me and I’ll get an answer from the household carpenter.

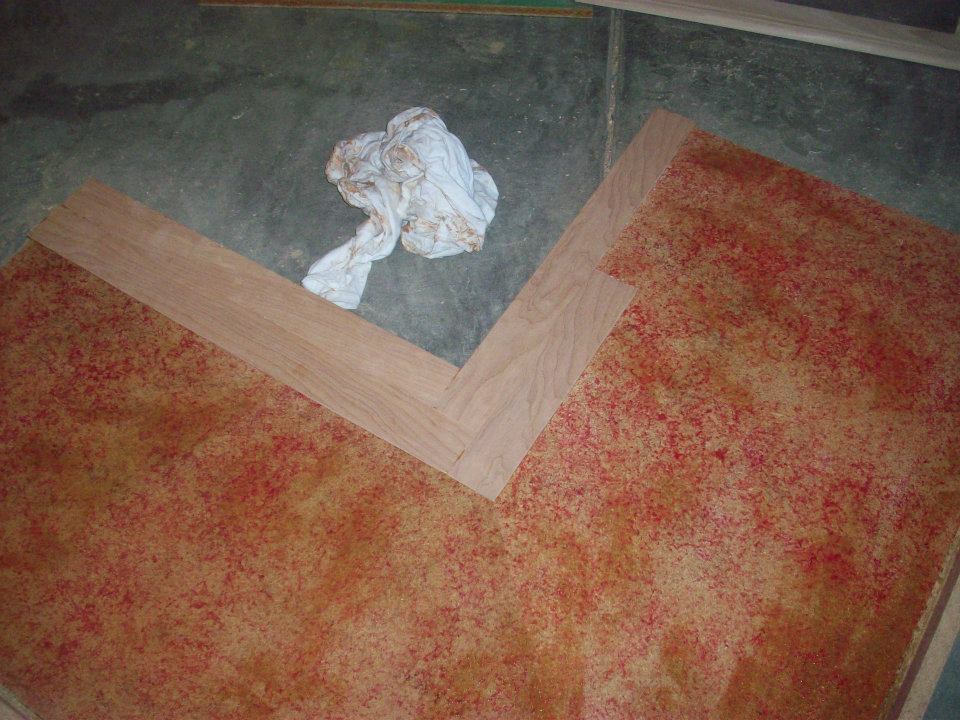
Step 1 in the process was to completely remove the laminate from the countertops. A hot iron, the putty knife and some elbow grease seemed to do the trick. Then your countertop is this ugly redish scary mess. The rounded parts of our countertops were trimmed off with a router.

That led us to step 2 where hubs ripped down strips of plywood. Yes, you read that right. Just straight up ol’ plywood. Comes in a sheet for like $10.


He then used cement contact glue to glue the strips of plywood to the countertop.


Then came lots and lots of wood filler to seal up some gaps between the strips of plywood.

He also trimmed pieces of wood to wrap around the edges of the countertop to make it look finished.

After its all dry, sanded and smooth came several rigorous rounds of staining. Dark walnut, mahogany, dark walnut, mahogany, then ebony around the edges to give it that "smokey" look.

He then used a satin polyurethane to seal the countertops. 6 coats. Steel wool in between each coat to smooth it out. The finish is a smooth as glass.

The backsplash is a compilation of mostly vintage yardsticks we’ve been collected for a few years. We needed a few more, so Ace, Home Depot and Lowes got in there too, but we sanded them down and stained them as well so they fit in with the oldies.


The countertops should hold up beautifully and the only maintenance we should have to perform is a yearly coat of poly. We will have to be cautious about hot items on the countertop, but we’ve got trivets galore.

Are you exhausted? I am. This is only the beginning. Next post...over 30 cabinet doors and drawers to be painted. Oh and working full time, being a mom to a toddler, keeping up with other general household tasks..exhausting I tell you. So tired. Did I already say that?

Monday, March 12, 2012

let's back track...home sweet home

***Disclaimer*** I've had this post in draft mode since November.  I can't believe I haven't been better about blogging!  Sorry.  Again. 

It only took one and a half years for our dream to come true. It’s done. We are blessed beyond belief with this beautiful structure we FINALLY get to call home!


We closed on November 17th, and by November 24th we had a house full of family and friends! 22 of them to be exact! We were seriously still unpacking boxes the morning of and Joey was installing the mailbox while the turkey was in the oven. But, we got it all done and had a wonderful time. The food was amazing that everybody brought, Joey made a delicious turkey, I made lil’ mini apple pies with my handy dandy new pie maker and we had lots to toast to. What a wonderful way to break in the new house!

Now that things are settling down a bit I’ve had time to put some personal touches on things. We already finished one big project that you may remember the beginning of here. We have always wanted a fireplace, well maybe not a fireplace per say, but definitely a mantle.  I scoured the internet for a chevron tile and while I did find some that was huge and WAY out of our price range, my husband once again came up with a brilliant solution. He quite simply said, “I’ll just cut tile to make the pattern.” Whaaaat? Well, okay then, knock yourself out. And he totally knocked it out of the park. It looks AMAZING!  I owe you a more updated shot of this as well.  Maybe a little more non-Christmasy.  On the to-do list now. 


I will admit that it did scare me a bit that we had the carpet ripped up in the living room after 9 days of living there. But, the outcome is better than I imagined.

Since then we've tackled the mother of all DIY projects.  Our kitchen.  I know, I know.  We just moved in.  But, from the date on our This Old House magazine that was our inspiration, it's been 5 years of drooling over this kitchen that we've always wanted.  I've got lots to post on that soon.  It may even have to be over several posts too.  Crazy town and the most disruptive project to my life to date. 
I also owe you a quick update on my 29th year bucket list. I can’t even believe I have like 3 months to get going on some of this!!!  Better get moving a little quicker!

Cross 6 more items off of my Pinterest boards. I made this wrapped letter (wish I would have read the tutorial first), made a grouping of embroidery hoops, made bags for the Favorte Things edition at my house (more on that soon), repurposed this shower curtain into wall art, got around to making some yarn wrapped wreaths, and fashioned this cute little stand for Kate’s toothbrushes and toothpaste.


I hit up the local farmer’s market this fall for some ridiculously awesome apples for myself and gifted some baskets as well. This spring I’ll venture to Findlay to do some serious shopping.

For the last ½ of my 29th year I need to:

Take a yoga class

Run or walk (or both) a 5K

Make at least one trip to Findlay Market

Get those pictures taken! AK! Scared!

D-E-R-B-Y (the plans are in the works, must find awesome hat and outfit or fascinator?)

Get to Chicago on the megabus - plans have actually changed  for this.  My BF, is expecting her first little bundle of joy in August and she just celebrated her 30th in February.  We've made a pact that after she has the baby we are going to go to Chicago together, sans children, and celebrate our birthdays all over again. 

Start planning this glamping trip - hold the phone.  Those plans have also been altered.  After much soul searching I decided that a farm dinner would be much more up my alley.  Let's be real honest.  I don't even like camping.  Why would I want to spend a big birthday celebration doing so?  So, we are just going to have a good old fashion farm fresh dinner party, and any dad's bluegrass band is going to provide the entertainment.  Lots of long tables end to end, all the way out into the field.  Candles.  Flowers.  Bluegrass music.  Sounds perfect. 

Find some peace, somewhere, somehow…although, I do already feel a sense of peace walking into this house every night.  Ahhhhh....home sweet home.

Thursday, March 8, 2012

finally, my favorite things

I remember when my group of friends hosted the first Favorite Things party.  It was back in July and we were neck deep in a trench working to get a utility pole moved.  What a nightmare that and really the whole summer was.  Anyway, fast forward to January and I finally got the opportunity to host the Favorite Things party at our new house.  Yay! 

If you are new, see this post on how to host your own Favorite Things party.  Our party this time was held at brunch and I was excited to try out lots of fun ideas from Pinterest.  One thing that was really fun was not only to spend the morning/afternoon with my favorite gals, but that we all got to actually sit down and eat.  Together.  At one table.  It was so fun to chat and drink coffee and mimosas.  We also themed this party and everybody brought their favorite beauty item for under $6.  I loved this because I think there are amazing products at the drugstore that you might not even know about! 

So, anyway, on to the pictures.  Hope some of you all have been able to host your own favorite things parties!

 ***Take a good look at that kitchen. Cause, it don't look like that anymore! Haha!

Friday, February 17, 2012

check me out on stockpilingmoms.com!!!

Hi.  Remember me?  I'm the gal with the new house and apparently the inability to find time to blog these days!!!  Gosh guys, I'm so sorry.  And I miss you!  We still are sans internet, but that's about to change! I have a new gig and I'll be doing lots of blogging soon! 


Every Friday you will find me over at Stockpilingmoms.com with a fun and frugal DIY project!  The lovely ladies that are the masterminds behind navigating the couponing world and being fabulous at the same time have asked lil ol' ME to be their DIY expert!!! 

Run over there right now and check out my first project.  Some of them you might remember from previous projects here on the Jar, so get refreshed on those and get ready for some new and exciting projects soon.  Hope you all are well and can't wait to get back to blogging really soon. 

P.S. You won't even believe what project we've gotten ourselves into...3 months almost to the day of moving in.  We are on our way to a new kitchen.  Crazy?  Perhaps :)  More to come soon! 


Tuesday, December 13, 2011

holiday presents for YOU!

I'm back!  It's been WAY too long since my last blog post and I do apologize!  I have so much to catch up on and I promise to do that soon, but I have more exciting stuff to tell you about now :)  On to the fun stuff!

Sara of In Small Spectacles is hosting an AMAZING giveaway on her blog!  Don't miss your opportunity to enter to win a beautiful pair of earrings!  All you have to do is follow the link below to be directed to her blog to sign up to win.  You have multiple ways to enter by following her blog, Facebook page and Twitter.  She will draw a winner on Saturday so be sure to enter! 


I also have some super adorable FREE printables from Mirabelle Creations!  Stop on over to Deanna's blog and see all of her insanely awesome party ideas! 


We should have internet connection at our new house soon and I'll be back in business then!  Hope you all are having a wonderful holiday season!